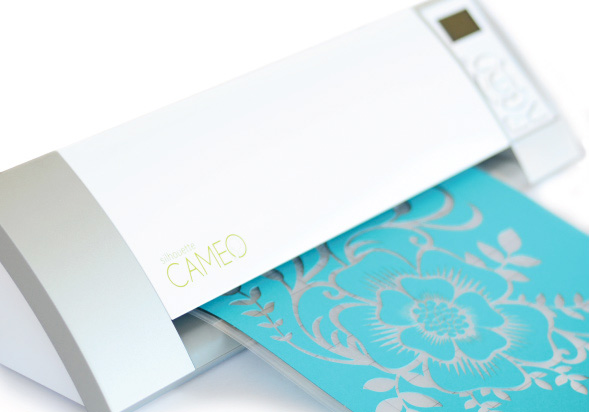
Category: Mitchell (Page 3 of 3)
cool song i made its a really awesome song so its about me in minecraft doing minecraft stuff! 😀
http://www.youtube.com/watch?v=IW8sq_SP2Tc
By: Andy Tucker
option+’=æ
option+a=å
option+p=π
option+i=ˆ
option+?=¿
option+/=÷
option+”=Æ
option+_=–
option+{=”
option+|=»
option+h=˙
option+W=„
plz rate!!!
This week our menu included sewing, marble-run-making, choose-your-own-adventure-story writing, bean bag making, and virtual Legos. Virtual Legos? What?! It’s true, right here with Build with Chrome. Unfortunately, we had some difficulties using Build with Chrome on the school laptops. Apparently a certain plug-in for Google Chrome kept crashing, but hopefully, we’ll find a way to fix that.
For the bean bags, very patient students took turns learning how to use the sewing machine to make a pocket. They then turned it inside out so that the seam was on the inside, filled the pocket with dried beans, and sewed the top closed. We need to learn not to throw the bean bags at each other, however. We don’t want anyone to get hurt.
Some students took matters into their own hands and independently made things, which is, of course, fantastic! Here is an example: a stop-motion animation that Vickie made.
The 3D printer that we were all excited to use last class unfortunately was not working for this class. We’ll try to have it fixed before next time.
To print something on the 3D printer, a student needs to design it in 3D modeling software like SketchUp or Tinkercad. Files that are ready to print can also be downloaded from Thingiverse, like the robots above. When the file is ready, we connect the printer to a computer and run makerware, which allows us to tell the printer what size, where, and in what direction the thing will print.
We’ve had a couple classes with 3D modeling so far, but SketchUp has been frustrating for quite a few students. Now that we understand how we can use SketchUp for printing objects, it might be easier to understand.
We had a busy week. We said goodbye to Squishy Circuits (but take a look at what happened when someone found a motor in the SC bag), added hand-sewing upcycled scarves, and kept going with origami and Snap Circuits. We also recorded our maker theme song so Theo can use it as he prepares a project on how to make our own speakers.
We weren’t quite as good at things like cleaning up (wow! What a mess the Snap Circuits were!) or listening respectfully during our closing meeting, both of which are important maker skills, so we’ll keep working on those!
Kristin
We have had three weeks’ worth of Squishy Circuits on our menu. Before we take retire it from active service, enjoy this video of a master sculptor at work. He’s creating a portrait of Squishy Circuits co-founder AnnMarie Thomas. Enjoy!
– Kristin
Wow – we have been really busy for our first two weeks of Michigan Makers at Mitchell! We have 25 students and a U-M team of four people, plus Mrs. T, Noah, and Mrs. C!
The first two weeks, we picked from these four activities:
- Snap Circuits
- Squishy Circuits
- Friendship Bracelets
- Origami
So we have been thinking about electrical circuits as well as many kinds of engineering: thread engineering, paper engineering, and clay engineering!
Check out the Mitchell sets on our Flickr page (and check out what the makers at the other Michigan Makers site are working on!).
We sometimes hear our makers say that something is “stupid,” but we’re learning that this really means, “I really want to figure this out, but I’m stuck and need help.”
We voted last week that we definitely wanted to keep working on Snap Circuits and origami. It was a toss-up whether we should keep friendship bracelets or Squishy Circuits going … so the mentors are deciding plus picking a new activity for November 4. What’s next? It’s a surprise …
– Kristin