Category: Scarlett (Page 2 of 2)

What’s in the Bag?

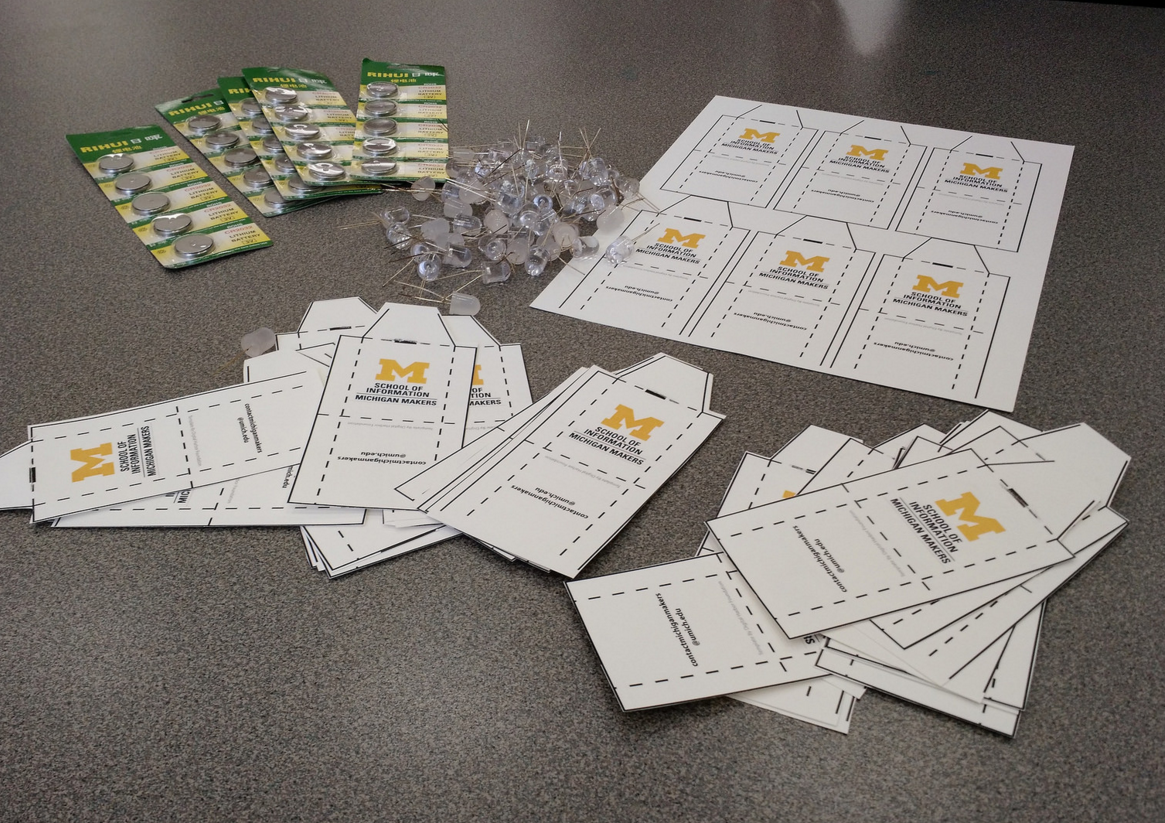
We’ve been a bit tech- heavy these past few weeks and wanted to change things up. One of our activities was inspired by “mystery architecture” activities, where students are given a mystery bag of materials and must use the materials to build a structure to meet a challenge.

We challenged the students to work in teams and build a tower as tall as they could in 25 minutes. The ONLY materials they could use were the ones in their mystery bags. The structure must stand long enough for us to take a measurement.

Here’s what was in their bags:
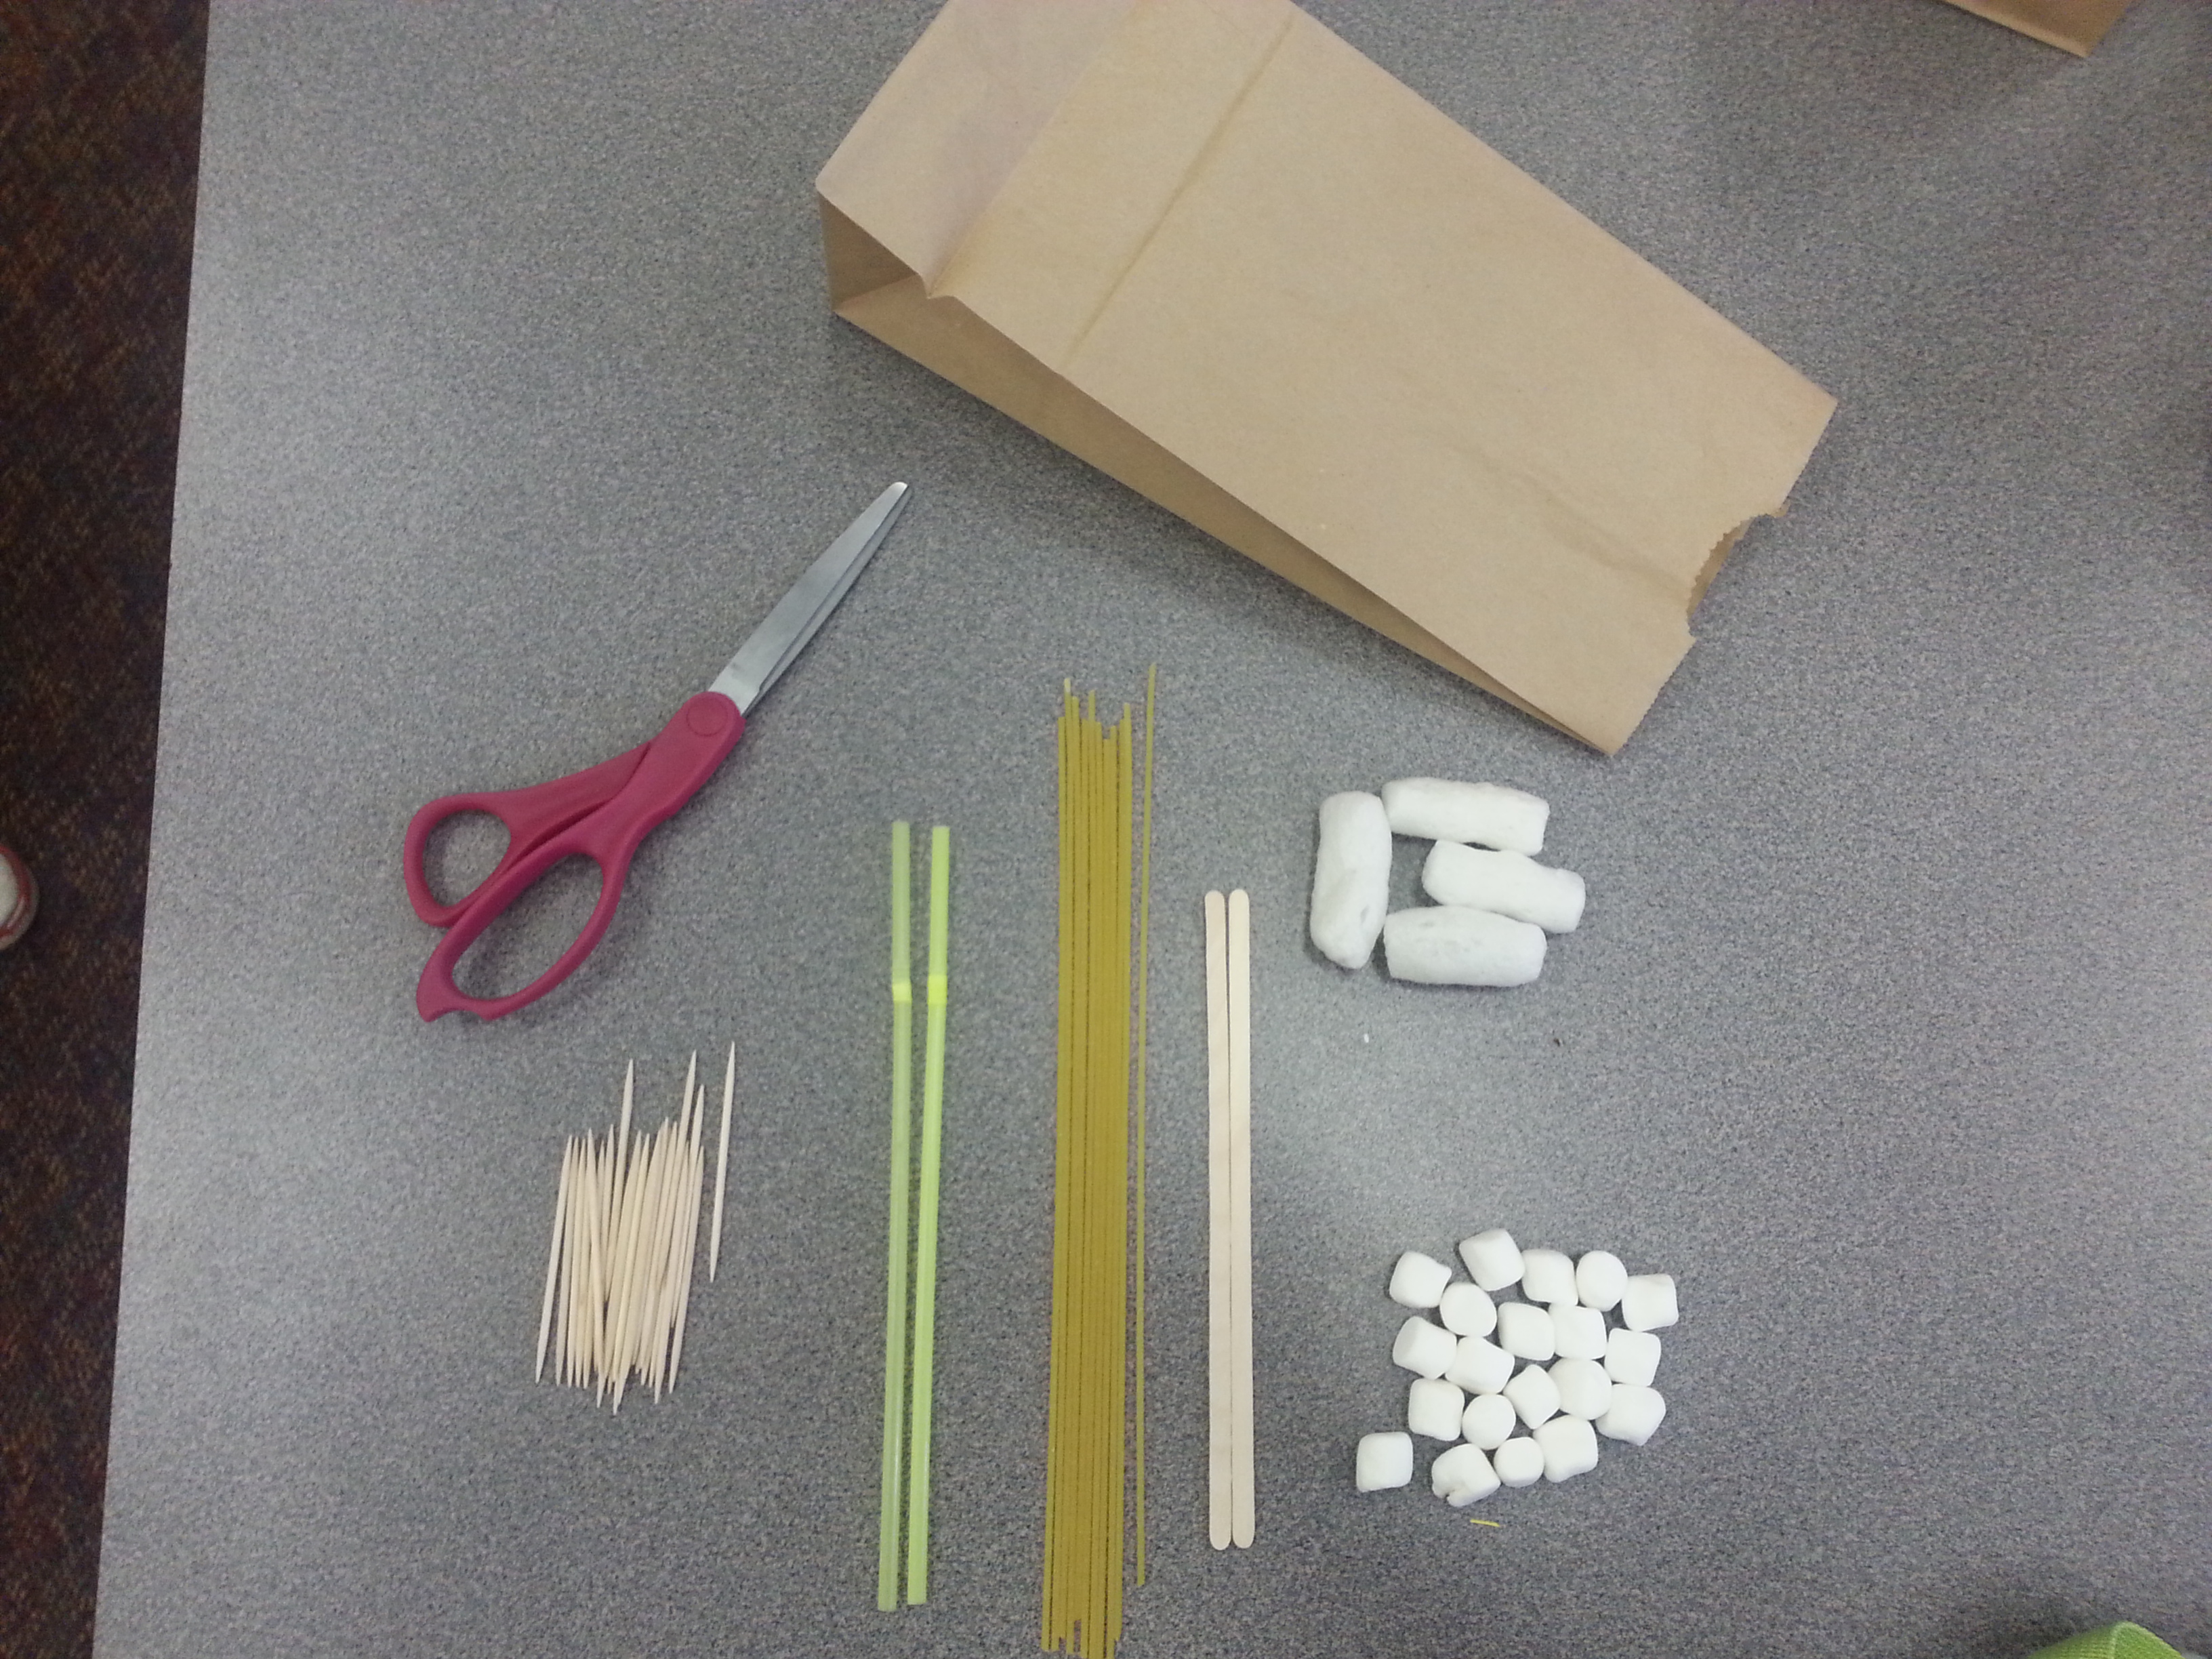
 

20151109_145249

  • 20 toothpicks
  • 20 mini-marshmallows
  • 10 pieces of dried spaghetti
  • 4 packing peanuts
  • 2 drinking straws
  • 2 coffee stirrers


The students took the the challenge right away. Some students surveyed the contents of their bag before strategizing how to best use the materials. Some dove right into building, sticking spaghetti into the marshmallows and creating height. It was exciting to watch them take such different approaches!

20151109_152749 20151109_152630

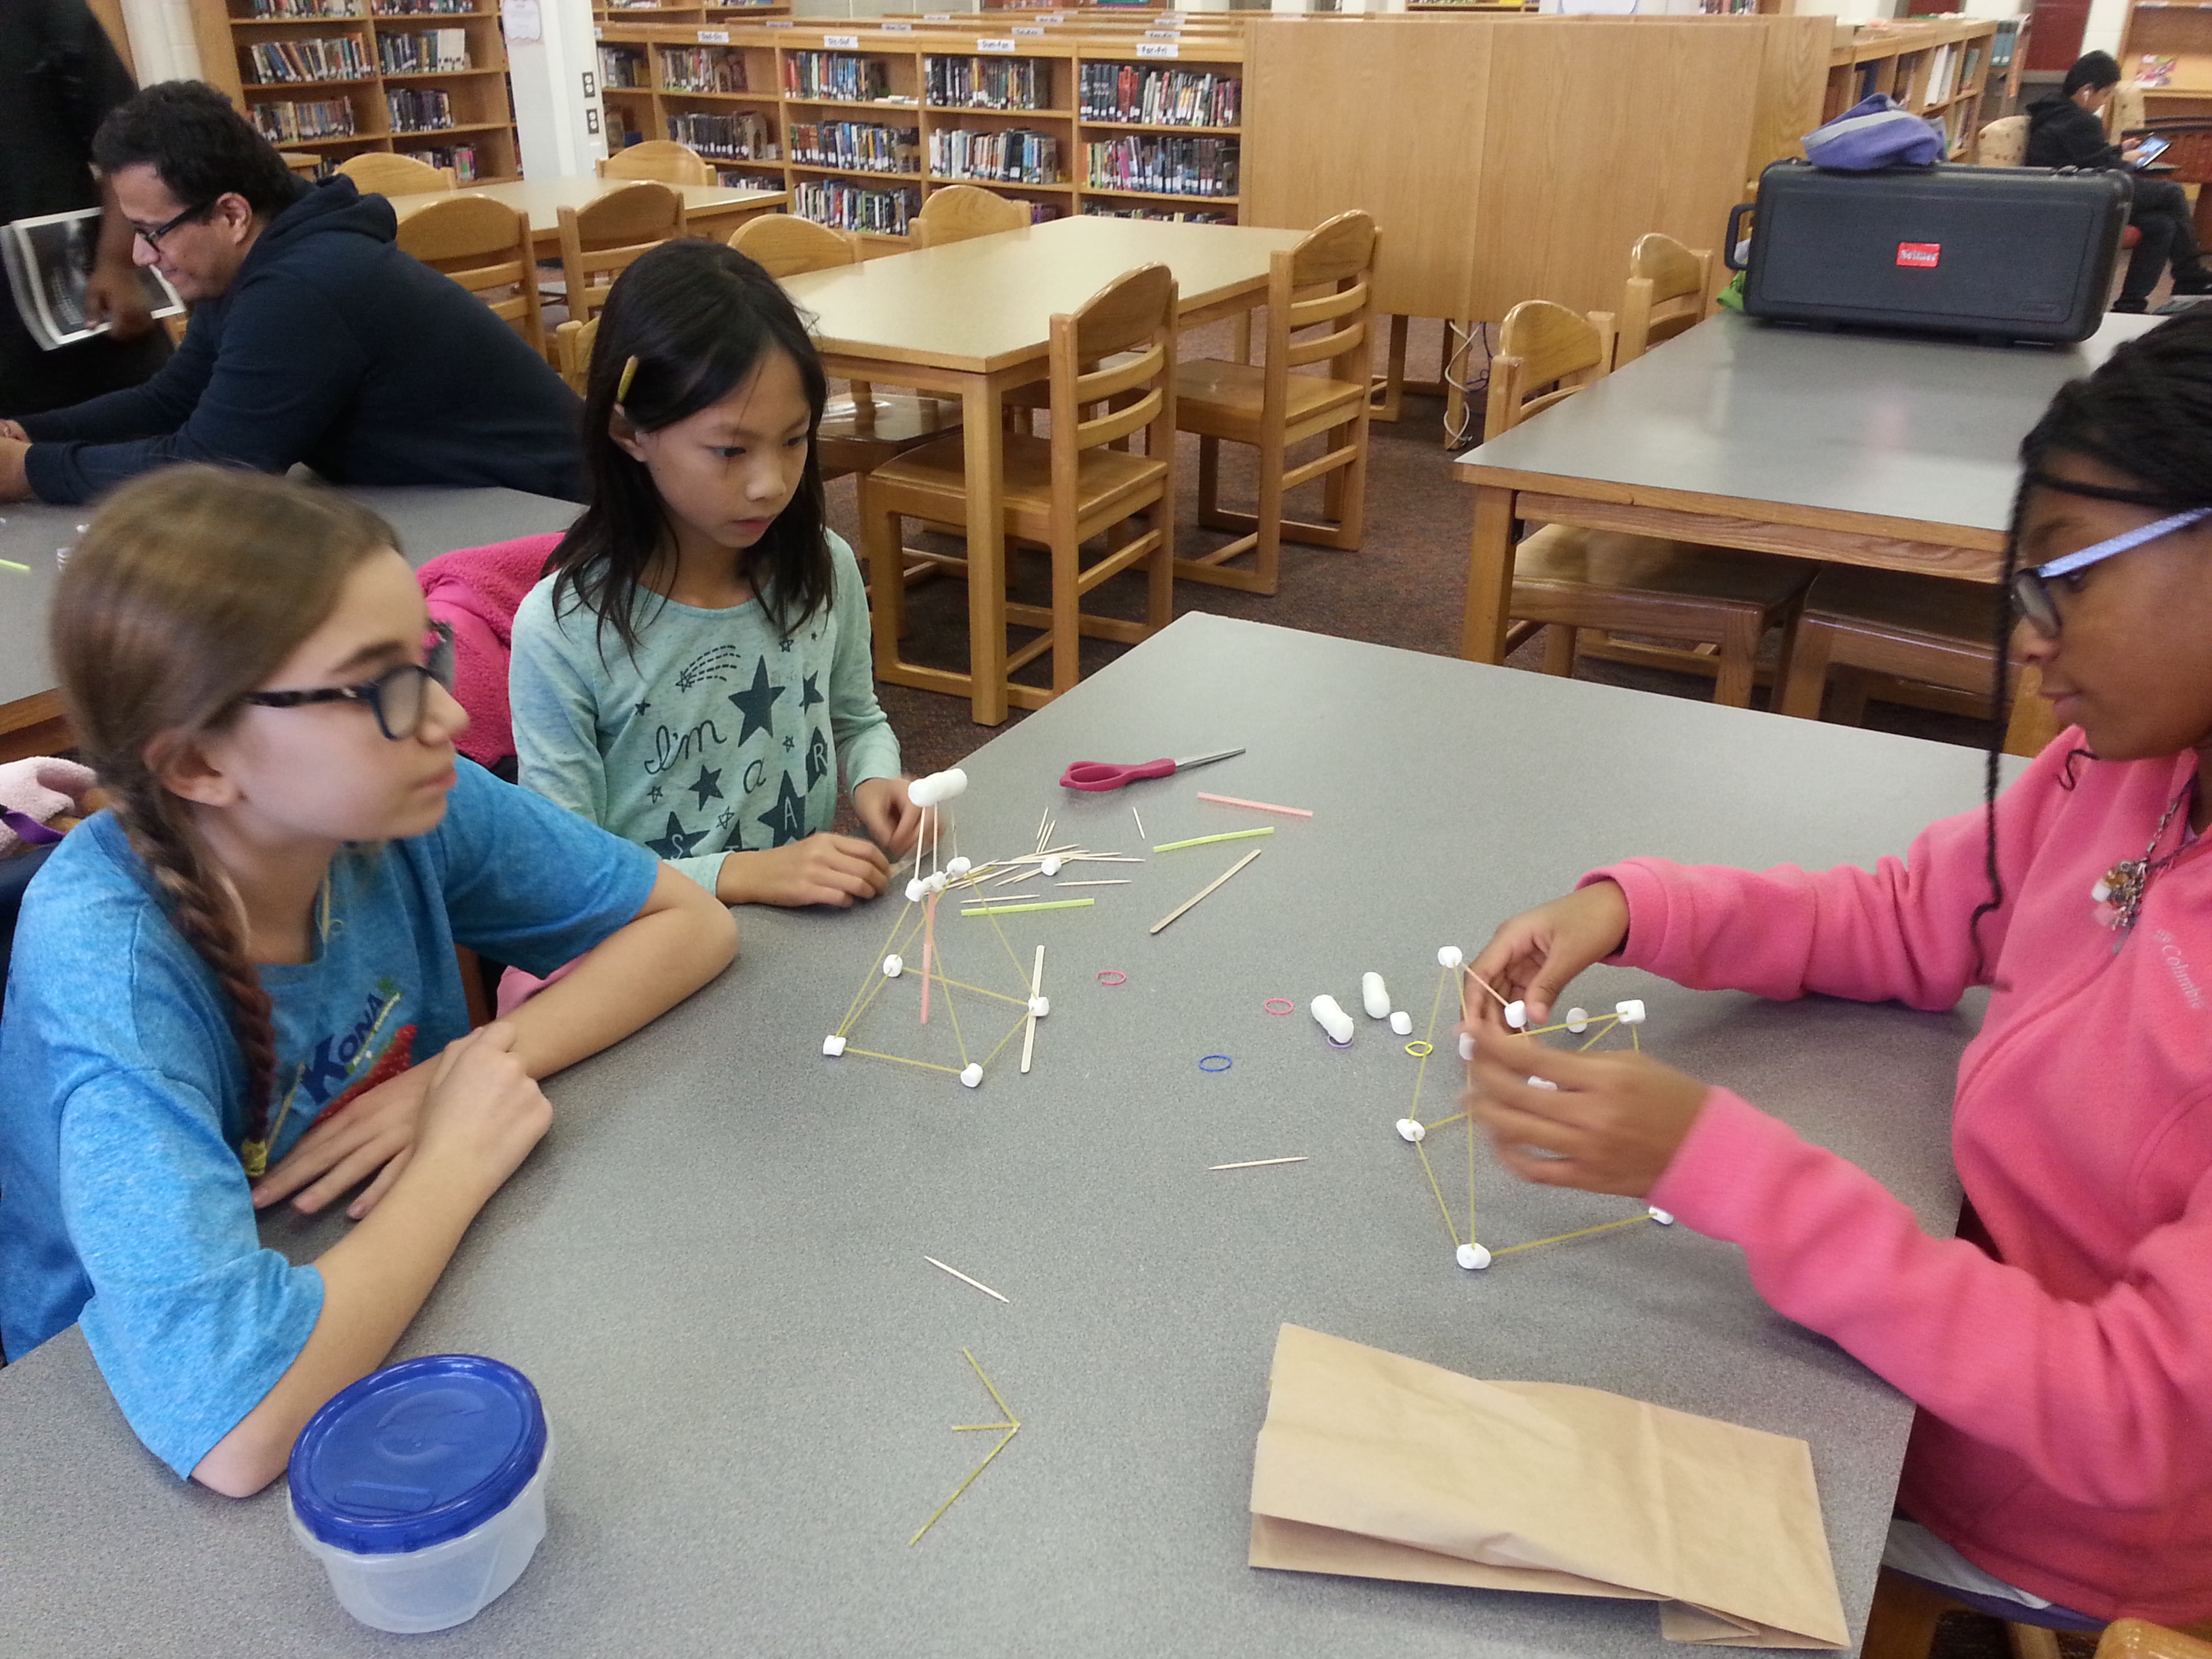
As structures started coming together (and climbing higher!), we noticed a lot of students taking a step back and figuring out how to address structural weaknesses. One team used a paper bag as the base but wanted to increase its stability since it was flimsy. Their solution? Roll up the opening of the paper bag (like you would to a long-sleeve shirt) to give it some stability. One student focused less on overall height and more on creating a solid, supportive base. We noticed all teams experimenting with triangle and square-shaped supports, figuring out which would be most secure.

Our highest tower stood at more than 3.5 feet tall!


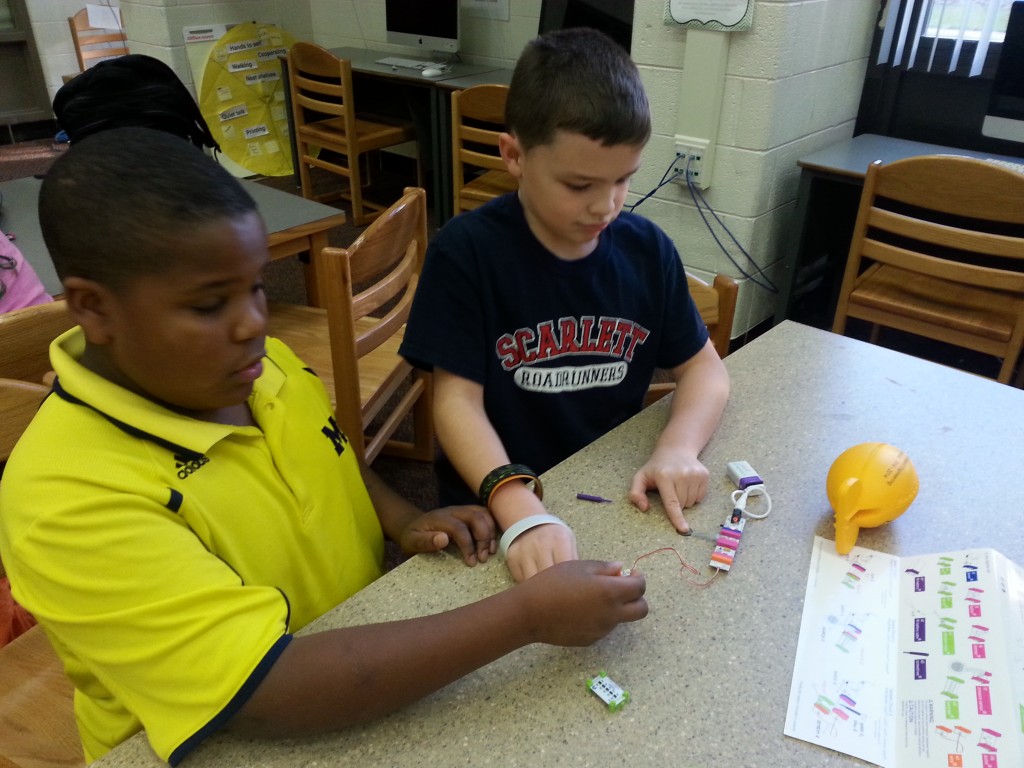
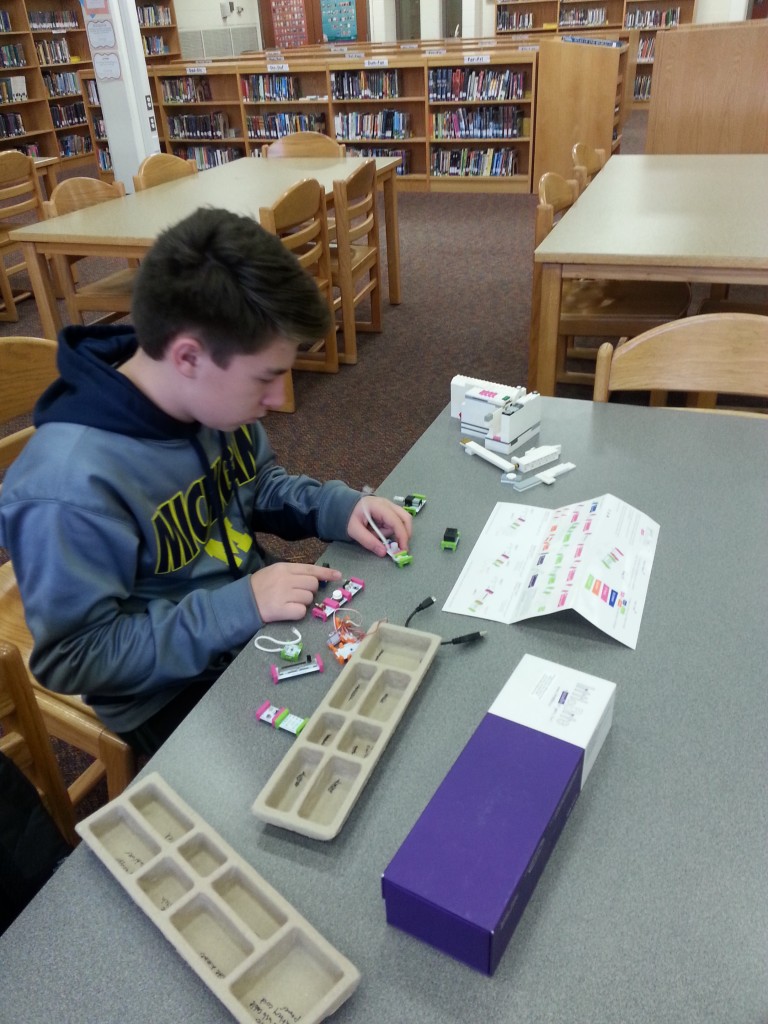
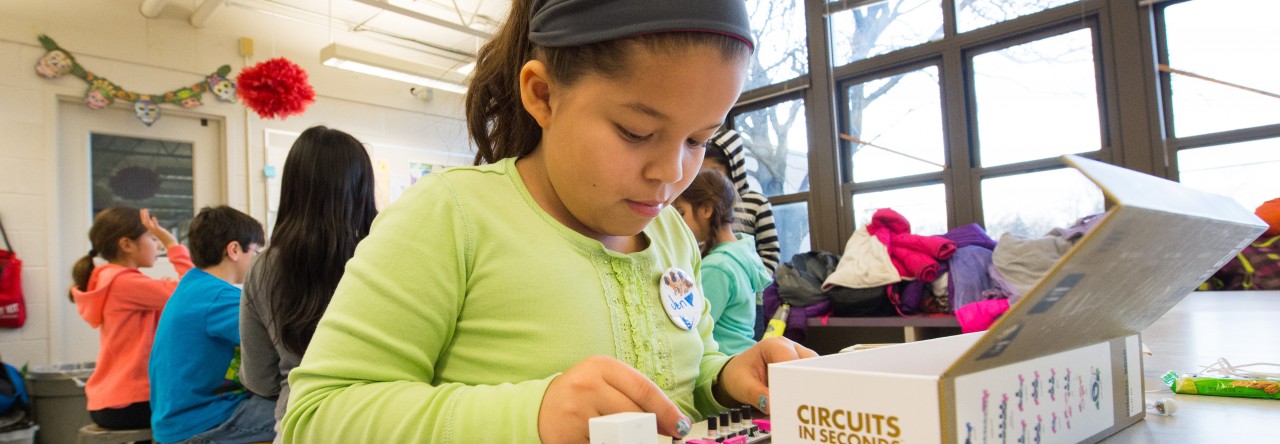
To wrap up the day, we introduced them to LittleBits. These kits come with components that snap together to make light, sound, and motion. Because the components can be arranged in so many ways, we saw a range of creations: a light that only comes on after pressing a pressure sensor and a light switch, to a sound device that produces intergalactic sounds. The kids were asking about whether we could combine kits and make bigger versions of what they were working on. To be continued on at another time in Michigan Makers…?

20151109_160224(0)

20151109_160331


Mummifying with Masking Tape

We’re a few days into November, but we can’t quite shake the Halloween spirit! This week, we grabbed some rolls of masking tape and a couple of straws to make spooky “mummy hands”.  We had a new Maker Mentor, Prakruthi, join us this week and we’re so excited to have her!

If you’re looking for a simple project that keeps kids engaged with just a few materials, this activity fits the bill.

This activity works best in pairs: one student is the “hand model” and the other wraps the masking tape around the hand model. The students can switch off after one mummy hand has been completed.

20151102_153128 20151102_153137


This is how it works:

  1. Place a plastic straw on the hand model’s hand so that it lines up from the tip of their middle finger down the center of their hand.
  2. Wrap masking tape around the hand (over the straw) in layers with the sticky side facing OUT (smooth, non-sticky side touches the skin). This is important because if the sticky side were touching the skin, it would be difficult and dangerous to remove the hand from the “tape cast” that forms. From our experience, it works best if you start from the base of the hand and wrap your way up the hand and around the fingers!
  3. Once your hand is covered, do a final layer of tape so that the smooth side faces OUT, creating a smooth, non-sticky exterior.
  4. To extract the hand, carefully use scissors to cut from the base of the hand up the palm (almost to the fingers) along the straw. The hand model can wiggle their hand out and tape the cut in order to close the hand.

Screen Shot 2015-11-04 at 5.07.57 PM

We had a bunch of fun with these! Some got creative with their hand poses and made claws with them. We heard kids talking about how cool it’d be to put lights into the hands or placing sensors in them to make noises when someone gets too close to the hand. Creating a mummy hand is just the beginning! What could YOU do with a mummy hand?


Screen Shot 2015-11-04 at 5.07.04 PM

DIY flashlights and Legos

We didn’t have Makers last week due to Fall Break at University of Michigan but were excited to get going again. With Halloween less than a week away, we had darkness and light on our minds. This week, we created homemade flashlights from LED’s, coin-sized batteries, and a simple paper stencil.

Screen Shot 2015-11-04 at 5.16.55 PM

This activity is a great refresher about creating simple circuits. When the end pins of the LED come in contact with the battery, the LED lights up but ONLY if the LED is in the correct orientation with respect to the battery! A few students didn’t know why their LED’s weren’t lighting up, and it was a great opportunity to review this concept.


By pressing on the housing (paper stencil) and creating contact between the battery and LED, we had our flashlights. By the end of the activity, we had flashlights in all different colors; it was like a light show! The students were excited to bring these Trick-or-Treating with them later this week.

Screen Shot 2015-11-04 at 5.17.25 PM
Some students moved on and began building with Legos. We encouraged them to somehow  incorporate their flashlights into their Lego creations. One student built a maximum security Lego house with a light that goes off when the door is opened, building on the flashlight that he made earlier. That’s pretty cool!

Screen Shot 2015-11-04 at 5.17.09 PM

Build it and “Trick” it out

This week, we tinkered with Legos and TechBox Tricks. Legos have been a favorite here at Michigan Makers, and our students immediately took to them, building everything from fortresses to landscapes. We were excited to bring along the TechBox tricks this week because they could easily be incorporated into just about anything you make, especially with Legos.


From the TechBox website:

“TechBox is a series of electronics modular kits for DIY enthusiasts, electronic beginners and educators. With the plug and make feature, the entry level TechBox Tricks sets you to a good start on a journey of creation without any requirement of programming knowledge.”


With the help of a 9V battery energy source, students constructed simple circuits by combining an input (such a light sensor or a switch) with an output (buzzer, spinning motor, or LED). We found students placing motors into their Lego structures, making conveyor belts and door alarms. One student even said that she would use the TechBox kit to create an alarm that would go off if it detected someone getting too close to her piggy bank. We get so excited when they think about how they could apply these concepts and ideas in their everyday lives!

Fun with Dash and Dot!

This week, we had some newcomers join us at Makers. To get them in the mindset of creating, building, and troubleshooting, we had the newcomers start with Hour of Code. HourofCode.org has a series of activities geared towards introducing students to coding. Our students worked on an activity creating snowflake shapes with Ana and Elsa from Disney’s “Frozen”. When someone got stuck, students that were ahead in the activity helped them along. It’s a great way to test your of the code and what you just learned!

Screen Shot 2015-11-04 at 5.23.34 PM

We also had Dot and Dash robots with us. We loaded our iPads with a number of different apps that would enable the students to control the robots. To command a robot to do something, some apps require the student to create a sequence of commands, which closely mirrored coding and the coding activities they did in Hour of Code.

Screen Shot 2015-11-04 at 5.23.24 PM
Our students got creative with these robots this week. With the Path app, students were able to design paths on the iPad for Dash to navigate in real life. They didn’t shy away from adding light and sound effects to the path, either!  

Intro to coding with “Hour of Code”

It was low-key this week, as we are still in the process of reaching out to students. For now, we are working with 6th graders. Our focus has been to get our students in the mindset of creating, building, and troubleshooting. We had our students start off with Hour of Code. HourofCode.org has a series of activities geared towards introducing students to coding. Our students worked on an activity creating snowflake shapes with Ana and Elsa from Disney’s “Frozen”.

IMG_0006

The online activities encourage them to experiment with different code combinations and figure out why they malfunction, an important skill that carries over into making and inventing! Several students saw resemblances to Blockly, a drag-and-drop, visual programming tool. As educators, we get excited seeing students making these connections and bringing their past experiences into new ones.

Page 2 of 2

Images © 2015 Regents of the University of Michigan. Text available under Creative Commons Attribution-NonCommercial-ShareAlike license unless otherwise stated. This project was made possible in part by the Institute of​ ​Museum and Library Services RE-05-15-0021-15.